Espresso Cookies with White Chocolate and Coffee Bean Garnish Recipe
Introduction
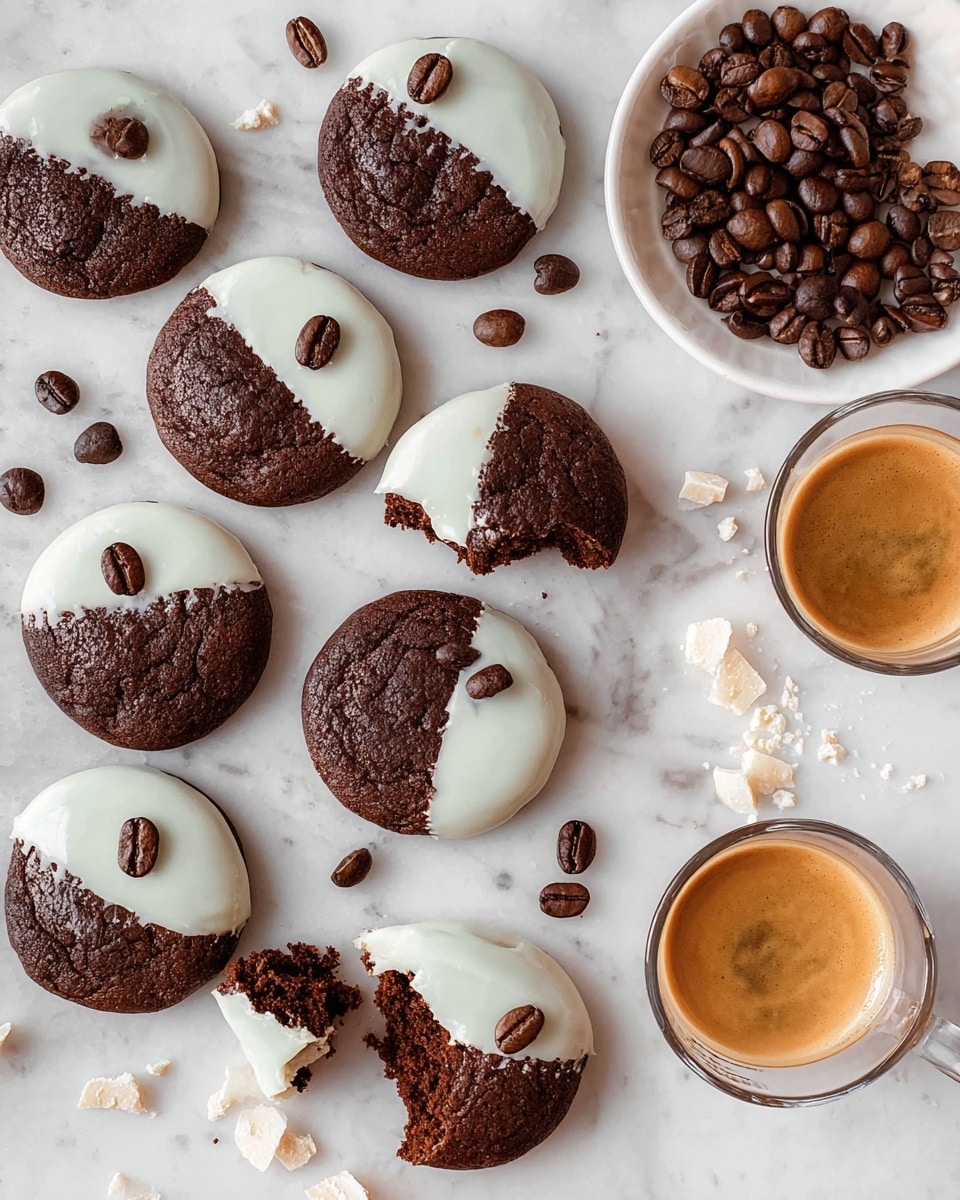
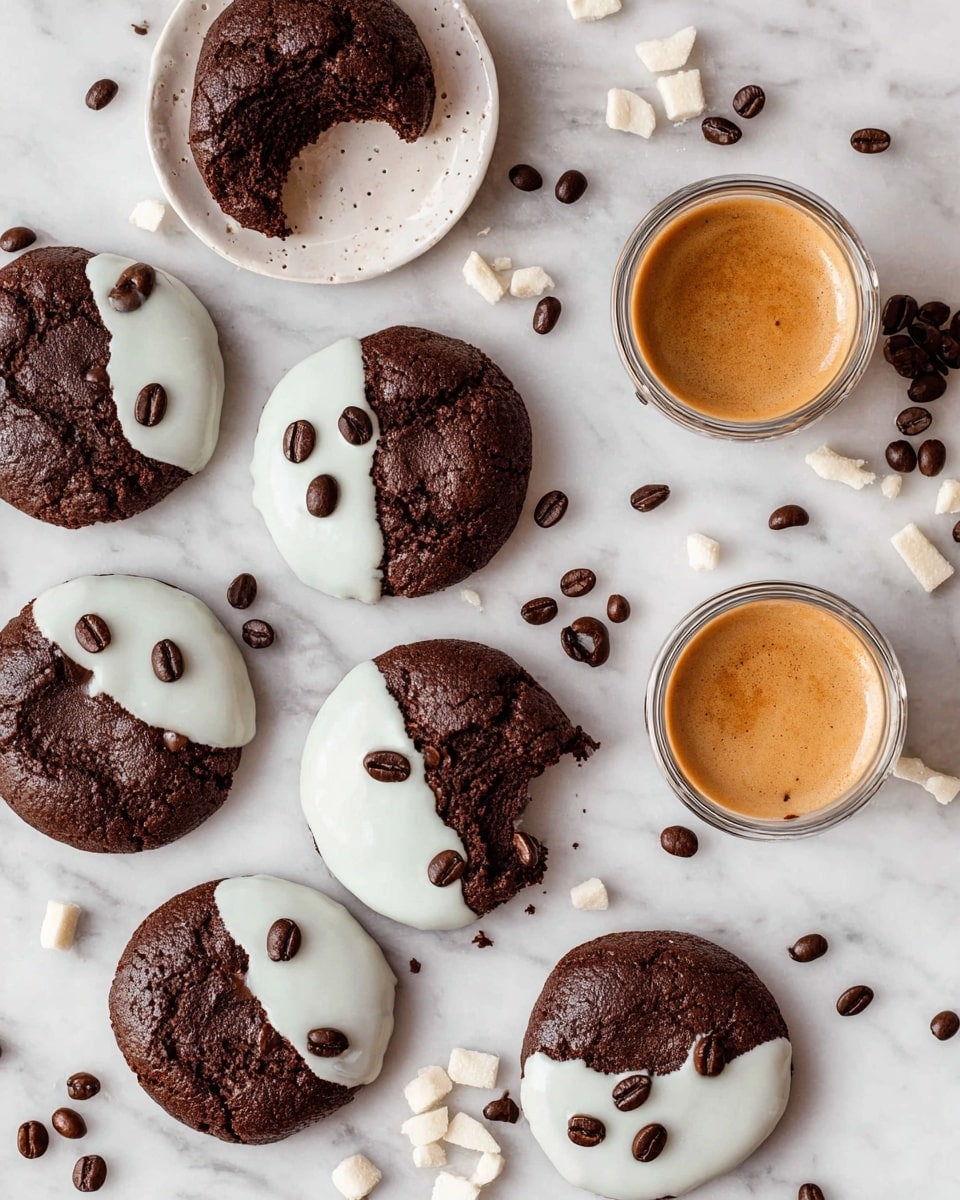
Espresso cookies are a delightful treat combining rich cocoa and bold espresso flavors, topped with smooth white chocolate and a coffee bean garnish. These cookies offer a perfect balance of sweet and slightly bitter, ideal for coffee lovers looking for a delicious homemade snack.
Ingredients
- 1 cup all-purpose flour (gluten-free if needed)
- 2/3 cup natural unsweetened cocoa powder
- 2 tablespoons instant espresso powder
- 1 teaspoon baking soda
- 1/2 teaspoon kosher salt
- 1/2 cup unsalted butter, room temperature
- 1/2 cup granulated sugar
- 1/2 cup light brown sugar, packed
- 1 large egg, room temperature
- 1 teaspoon vanilla extract
- 1 1/2 teaspoons rum extract
- 1 tablespoon milk
- 10-12 ounces premium white chocolate
- Coffee beans to garnish
Instructions
- Step 1: In a medium bowl, whisk together the flour, cocoa powder, instant espresso powder, baking soda, and salt until fully combined.
- Step 2: In a separate large bowl, use an electric mixer or stand mixer with a paddle attachment to beat the butter, granulated sugar, and brown sugar on medium-high speed for 2-3 minutes until creamy.
- Step 3: Add the egg, vanilla extract, rum extract, and milk to the butter mixture. Beat on medium speed for 1-2 minutes until light and fluffy, scraping down the bowl as needed.
- Step 4: Reduce the mixer speed to low and gradually add the dry ingredients to the wet ingredients. Mix until just combined.
- Step 5: Cover the dough with plastic wrap and chill in the refrigerator for at least 2 hours, ideally overnight for best results. Longer chilling (up to 3 days) will result in thicker cookies.
- Step 6: Preheat the oven to 350°F (175°C) and line two large baking sheets with parchment paper. If the dough was chilled more than 24 hours, let it soften at room temperature for 15-30 minutes before scooping.
- Step 7: Using a medium cookie scoop (about 3 tablespoons), scoop the dough and place on the prepared baking sheets, spacing them 2-3 inches apart. Wet your hands slightly if the dough is sticky.
- Step 8: Bake the cookies for 10-12 minutes until the edges are set and the tops look slightly soft. Allow the cookies to cool on the baking sheet for 5 minutes, then transfer to a wire rack to cool completely.
- Step 9: While the cookies cool, melt the white chocolate in a microwave-safe bowl in 30-second increments, stirring between each until smooth.
- Step 10: Dip half of each cooled cookie into the melted white chocolate, place on parchment paper, and garnish with 1-3 coffee beans. Let the chocolate set at room temperature or chill briefly in the freezer.
Tips & Variations
- For a vegan version, substitute butter with coconut oil or vegan butter and use a flax egg instead of a regular egg.
- Chilling the dough longer helps prevent spreading and creates thicker, chewier cookies.
- Swap rum extract with almond or hazelnut extract for a different flavor twist.
- You can use dark or milk chocolate instead of white chocolate for dipping if preferred.
Storage
Store baked cookies in an airtight container at room temperature for up to 5 days to maintain freshness. They can also be frozen for up to 3 months. When ready to eat, thaw frozen cookies at room temperature. If the chocolate coating softens, chill briefly before serving.
How to Serve
Serve this delicious recipe with your favorite sides.
FAQs
Can I use regular brewed espresso instead of instant espresso powder?
It’s best to use instant espresso powder because it dissolves evenly into the dough without adding extra moisture, ensuring the right texture. Brewed espresso can alter the dough’s consistency and may require adjusting wet ingredients.
Why is chilling the cookie dough important?
Chilling solidifies the fats in the dough, which reduces spreading during baking and helps develop deeper flavors. It also results in thicker, chewier cookies with better texture.
PrintEspresso Cookies with White Chocolate and Coffee Bean Garnish Recipe

These Espresso Cookies combine rich cocoa and bold espresso flavors in a soft, chewy cookie topped with luscious white chocolate and garnished with coffee beans. Perfect for coffee lovers, these cookies balance sweetness and coffee intensity for a delightful treat.
- Prep Time: 20 minutes
- Cook Time: 12 minutes
- Total Time: 2 hours 32 minutes (including chilling time)
- Yield: 24 cookies 1x
- Category: Dessert
- Method: Baking
- Cuisine: American
Ingredients
Dry Ingredients
- 1 cup all-purpose flour (gluten-free if needed)
- 2/3 cup natural unsweetened cocoa powder
- 2 Tablespoons instant espresso powder
- 1 teaspoon baking soda
- 1/2 teaspoon kosher salt
Wet Ingredients
- 1/2 cup unsalted butter, room temperature
- 1/2 cup granulated sugar
- 1/2 cup light brown sugar, packed
- 1 large egg, room temperature
- 1 teaspoon vanilla extract
- 1 1/2 teaspoons rum extract
- 1 Tablespoon milk
Topping
- 10–12 ounces premium white chocolate
- Coffee beans to garnish
Instructions
- Combine Dry Ingredients: In a medium bowl, whisk together the flour, cocoa powder, instant espresso powder, baking soda, and kosher salt until well combined. This ensures even distribution of leavening and flavorings.
- Cream Butter and Sugars: In a separate large bowl, beat the room temperature butter with the granulated sugar and light brown sugar on medium-high speed for 2-3 minutes using an electric or stand mixer fitted with a paddle attachment. This step aerates the mixture for a light texture.
- Add Wet Flavorings: Add the egg, vanilla extract, rum extract, and milk to the butter and sugar mixture. Beat on medium speed for 1-2 minutes until the mixture is light and fluffy, scraping down the sides of the bowl as needed.
- Incorporate Dry Ingredients: Reduce mixer speed to low and slowly add the dry ingredient mixture to the wet ingredients until just combined. Avoid overmixing to maintain tender cookies.
- Chill the Dough: Cover the cookie dough with plastic wrap and refrigerate for at least 2 hours and up to 3 days. Chilling thickens the dough and prevents cookie spreading during baking for thicker, chewier cookies.
- Preheat and Prepare Baking Sheets: Preheat your oven to 350°F (175°C) and line two large baking sheets with parchment paper. If chilled more than 24 hours, let dough soften at room temperature for 15-30 minutes to ease scooping.
- Scoop Cookies: Using a 3-tablespoon cookie scoop, drop dough 2-3 inches apart on the prepared baking sheets. The dough will be sticky; wet your hands slightly if needed to handle it effectively.
- Bake: Bake in the preheated oven for 10-12 minutes or until the cookie edges are set and tops appear slightly soft. Remove from oven and cool on the baking sheet for 5 minutes before transferring to a wire rack to cool completely.
- Melt White Chocolate: While cookies cool, place white chocolate in a microwave-safe tall container and microwave in 30-second intervals, stirring between each, until completely melted and smooth.
- Decorate Cookies: Dip half of each cooled cookie into the melted white chocolate and place on parchment paper. Garnish each dipped cookie with 1-3 coffee beans. Let set at room temperature or place briefly in the freezer to harden the chocolate coating.
- Storage: Store baked cookies in an airtight container at room temperature for up to 5 days or freeze for up to 3 months to retain freshness.
Notes
- For best texture and thickness, chill the dough overnight or up to 3 days.
- Use gluten-free flour if gluten is a concern.
- Room temperature butter and egg ensure proper mixing and texture.
- Wet your hands when handling sticky dough to prevent sticking.
- White chocolate frosting adds a creamy, sweet contrast to the bitter espresso flavor.
- Cookies can be frozen after baking and decorating with chocolate.
Keywords: espresso cookies, coffee flavored cookies, white chocolate dipped cookies, chocolate espresso dessert, easy cookie recipe