Cheesy Hatch Green Chile Dip Recipe
Introduction
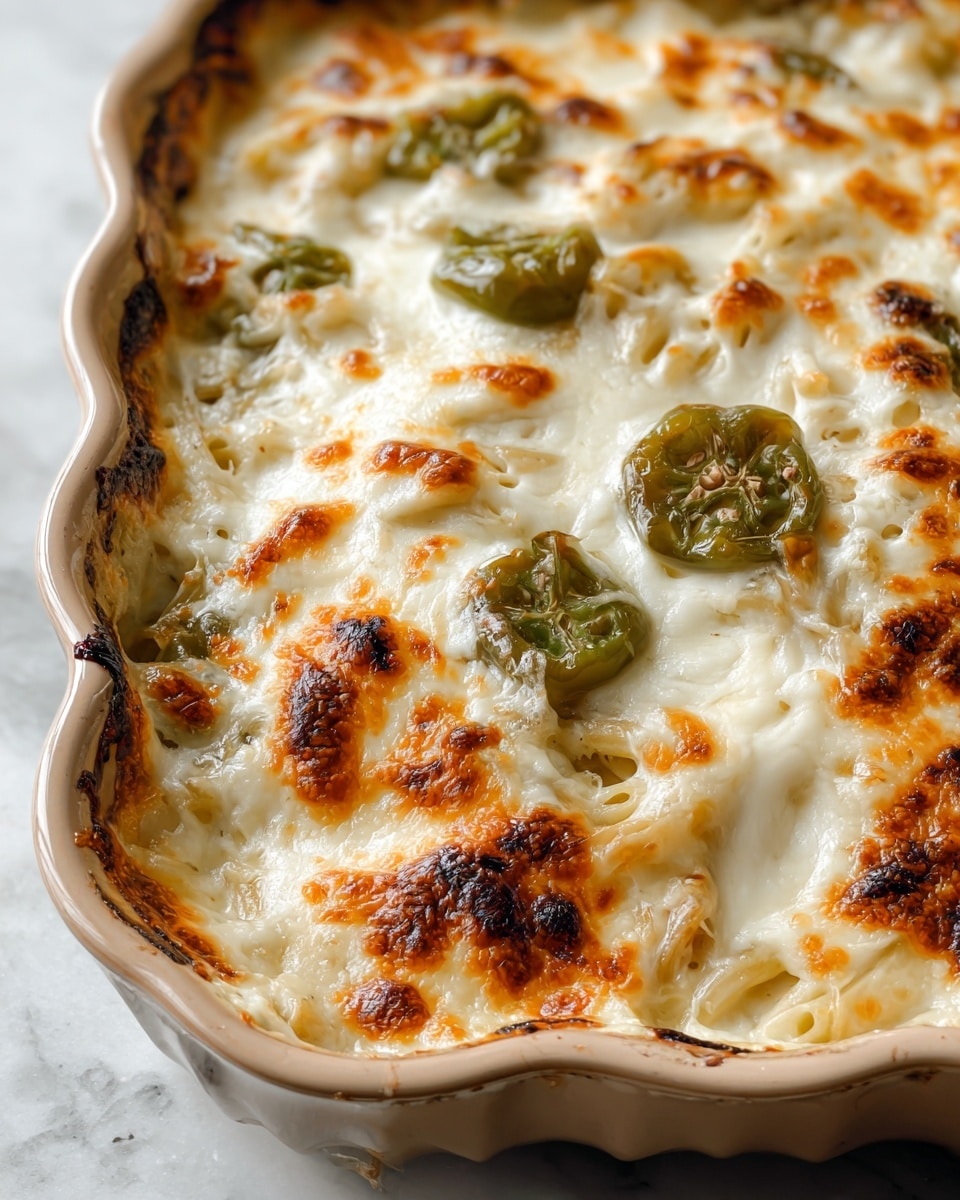
Cheesy Hatch Green Chile Dip is a flavorful and comforting appetizer that combines the mild heat of Hatch green chiles with a creamy, cheesy base. Perfect for sharing at parties or enjoying as a warm snack, this dip is easy to prepare and full of Southwestern flair.
Ingredients
- 1 cup of diced roasted Hatch green chiles (fresh or canned)
- 2 cups of shredded cheese (Monterey Jack, cheddar, or pepper jack blend)
- 1 cup of cream cheese, softened
- 1/2 cup of sour cream
- 1/2 teaspoon of garlic powder
- 1/2 teaspoon of onion powder
- Salt and pepper to taste
- 1 tablespoon of olive oil (optional, for extra flavor)
- Chopped green onions or cilantro for garnish (optional)
Instructions
- Step 1: Preheat your oven to 350 degrees Fahrenheit to prepare for baking the dip.
- Step 2: In a large bowl, mix the softened cream cheese and sour cream together until smooth using a hand mixer or whisk. Fold in the shredded cheese and diced Hatch green chiles, then add garlic powder and onion powder. Stir until evenly combined.
- Step 3: Season the mixture with salt and pepper according to your taste. If desired, drizzle in olive oil for extra flavor and stir to distribute evenly.
- Step 4: Transfer the mixture to a baking dish and spread it evenly. Bake for 20 to 25 minutes until the top is bubbly and golden brown. Watch carefully near the end to avoid overcooking.
- Step 5: Let the dip cool for a few minutes before garnishing with chopped green onions or cilantro. Serve warm with tortilla chips, fresh vegetables, or as a nacho topping.
Tips & Variations
- Use a mix of cheeses to balance creaminess and flavor; pepper jack adds a nice spicy kick.
- Adjust the amount of Hatch green chiles depending on your preferred heat level.
- For a smoother texture, blend the ingredients briefly before baking.
- Try adding cooked, crumbled sausage or bacon for a meaty twist.
Storage
Store leftover dip in an airtight container in the refrigerator for up to 3 days. Reheat gently in the oven or microwave until warmed through, stirring occasionally to maintain creaminess.
How to Serve

Serve this delicious recipe with your favorite sides.
FAQs
Can I use fresh green chiles instead of canned?
Yes, fresh roasted Hatch green chiles work wonderfully and offer a brighter flavor. Just be sure they are diced and cooled before mixing.
Is this dip spicy?
The heat level depends on the type and amount of green chiles used. Using milder chiles will give you a gentle warmth, while pepper jack cheese and more chiles add extra spice.
PrintCheesy Hatch Green Chile Dip Recipe

This Cheesy Hatch Green Chile Dip is a creamy, flavorful appetizer featuring roasted Hatch green chiles and a blend of melted cheeses. Perfectly seasoned and baked until bubbly and golden, this dip is a crowd-pleaser ideal for game days, parties, or casual gatherings.
- Prep Time: 10 minutes
- Cook Time: 25 minutes
- Total Time: 35 minutes
- Yield: Approximately 8 servings 1x
- Category: Appetizer
- Method: Baking
- Cuisine: American Southwest
- Diet: Gluten Free
Ingredients
Main Ingredients
- 1 cup diced roasted Hatch green chiles (fresh or canned)
- 2 cups shredded cheese (Monterey Jack, cheddar, or pepper jack blend)
- 1 cup cream cheese, softened
- 1/2 cup sour cream
Seasonings and Extras
- 1/2 teaspoon garlic powder
- 1/2 teaspoon onion powder
- Salt and pepper to taste
- 1 tablespoon olive oil (optional, for extra flavor)
- Chopped green onions or cilantro for garnish (optional)
Instructions
- Preheat Your Oven: Preheat your oven to 350 degrees Fahrenheit to prepare for baking the dip to achieve a melty cheese texture.
- Mix Your Ingredients: In a large bowl, combine the softened cream cheese and sour cream, blending until smooth using a hand mixer or whisk. Fold in the shredded cheese and diced Hatch green chiles, then add garlic powder and onion powder. Stir everything until evenly mixed.
- Season: Season the mixture with salt and pepper to taste. Optionally, drizzle in olive oil for extra flavor and stir to distribute seasoning evenly.
- Baking Time: Transfer the mixture into a baking dish, spreading evenly. Bake in the preheated oven for 20 to 25 minutes until the top is bubbly and golden brown, watching to avoid overcooking.
- Garnish and Serve: Let the dip cool for a few minutes after baking. Garnish with chopped green onions or cilantro if desired. Serve warm with tortilla chips, fresh vegetables, or as a nacho topping.
Notes
- Adjust the amount of Hatch green chiles to control the heat level.
- Use a cheese blend to add complexity and flavor.
- Allow the dip to cool slightly before serving to avoid burns.
- Olive oil is optional but adds a nice richness to the dip.
- Can be made ahead and reheated before serving.
Keywords: Hatch green chile dip, cheesy dip, baked dip, appetizer, Southwestern recipe, party dip, cheesy green chile