Blackberry Pavlovas Recipe
Introduction
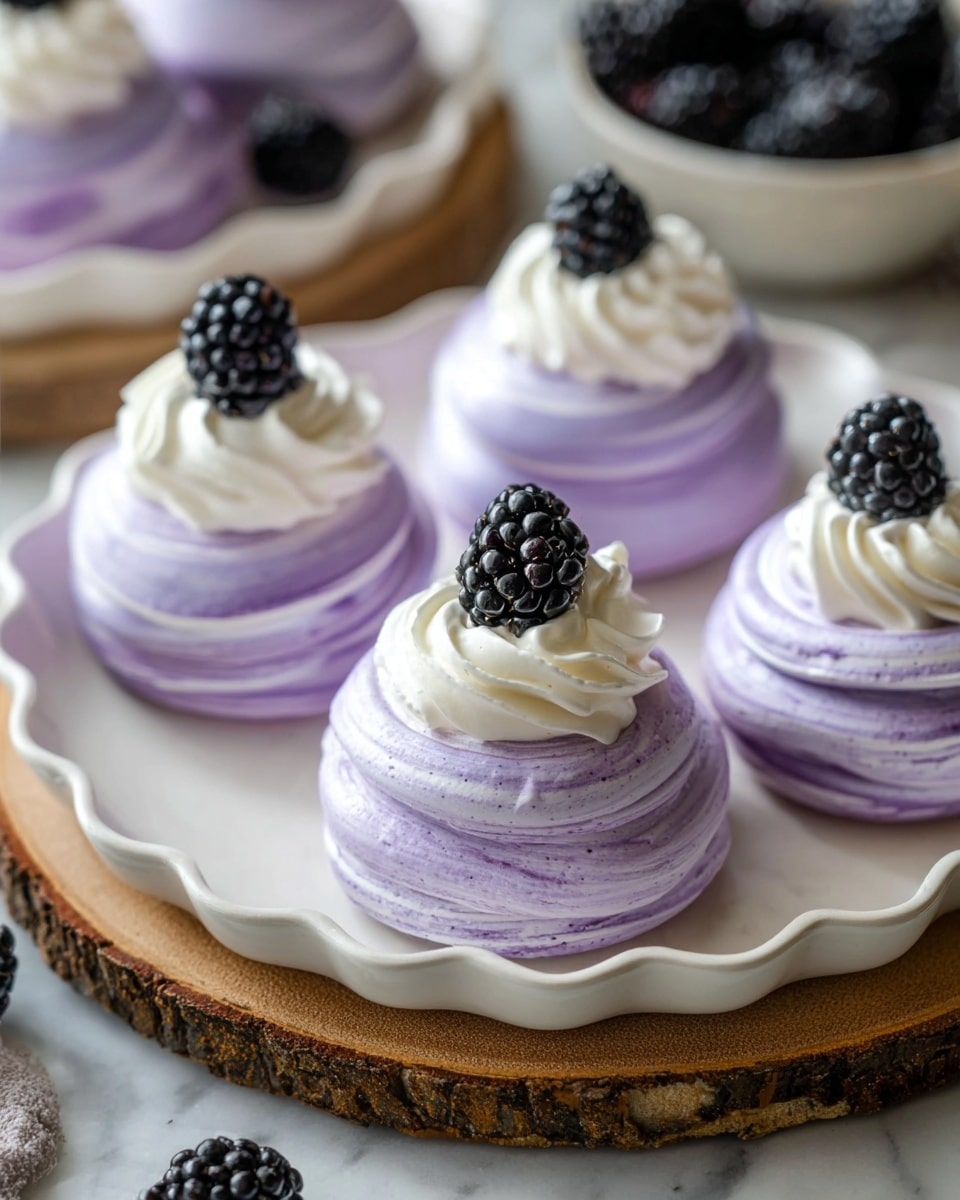
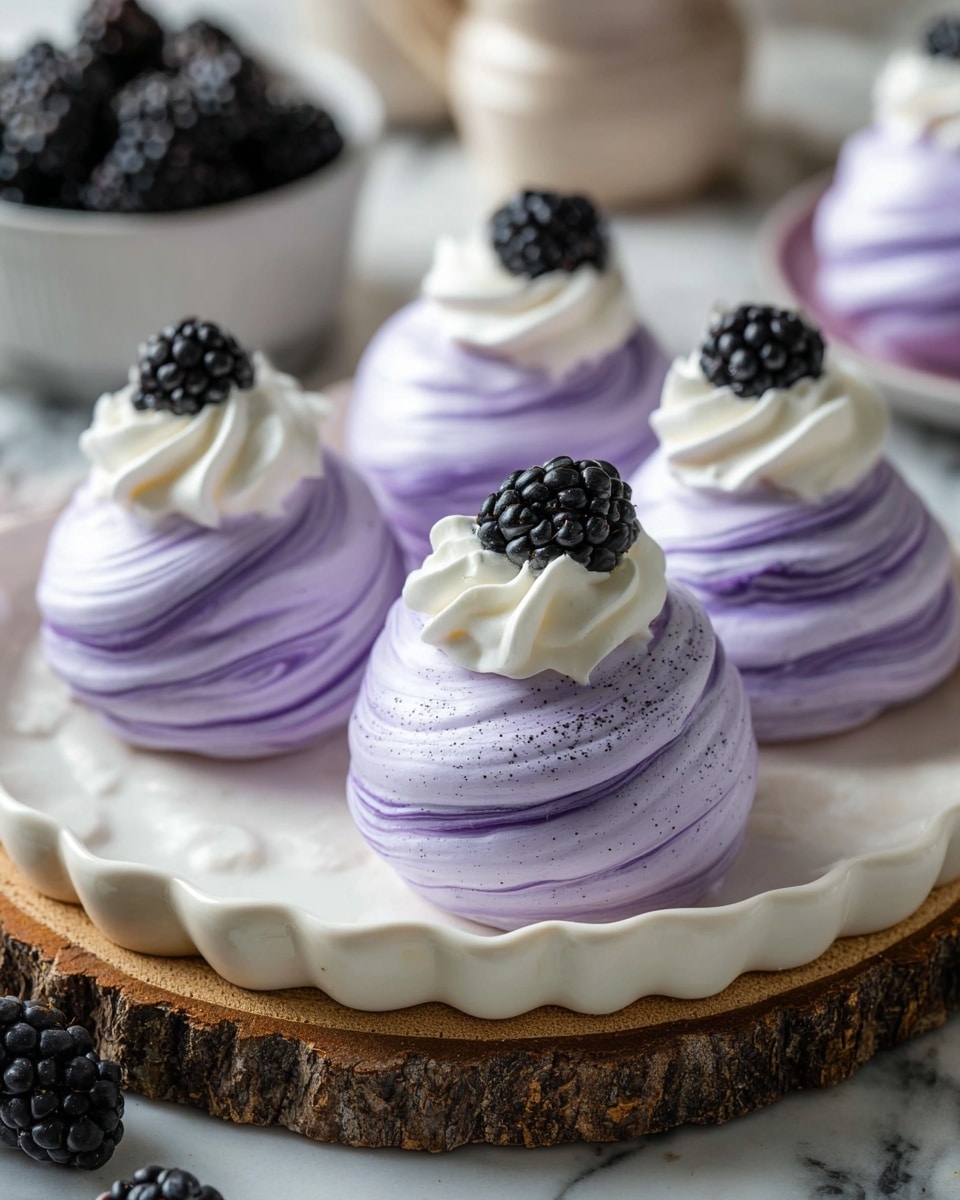
Blackberry Pavlovas are delicate meringue nests topped with luscious blackberry jam and fluffy whipped cream. This dessert is perfect for impressing guests or treating yourself with its crunchy exterior and soft, fruity center.
Ingredients
- 5 egg whites
- 1 1/4 cup granulated sugar (250 grams)
- A few drops purple food coloring
- 2 tbsp cornstarch
- 2 tsp lemon juice
- 2 cups blackberries (280 grams)
- 1/4 cup sugar (50 grams) or any sweetener such as maple syrup or honey
- 2 tbsp lemon juice
- 1 tbsp cornstarch
- 2 tbsp water
- 1 1/2 cups cold heavy cream (354 ml)
- 1/4 cup powdered sugar (31 grams)
- 1 tsp vanilla
Instructions
- Step 1: Preheat the oven to 250°F (120°C). Line two baking sheets with parchment paper and set aside.
- Step 2: Whip the egg whites on medium speed with an electric mixer for 1 minute. Gradually add the granulated sugar while whipping.
- Step 3: Increase the speed to high and whip for a total of 10 to 12 minutes until stiff, glossy peaks form. Add the purple food coloring around minute 8, unless using the swirl technique described below.
- Step 4: Gently fold in the cornstarch and lemon juice using a spatula until combined.
- Step 5: For swirl pavlovas, brush gel food coloring inside the piping bag before filling it with meringue to create colorful streaks.
- Step 6: Transfer the meringue into two 16” piping bags fitted with an open star tip.
- Step 7: Pipe 3 1/2” nests on the prepared baking sheets, leaving a hollow center for filling.
- Step 8: Bake for 1 hour. Turn the oven off and leave the pavlovas inside for an additional 30 minutes. Let them cool completely before filling.
- Step 9: To make the blackberry jam, combine blackberries, sugar, lemon juice, and 2 tbsp water in a small saucepan. Bring to a boil over medium heat and cook for 5–10 minutes, adding water if needed.
- Step 10: Dissolve 1 tbsp cornstarch in 2 tbsp water and stir into the jam. Cook for 1 more minute until thickened. Chill the jam in the fridge.
- Step 11: Just before serving, whip the cream with powdered sugar and vanilla on medium-high speed until stiff peaks form.
- Step 12: Spoon blackberry jam into each pavlova nest, top with whipped cream, and garnish with fresh blackberries.
Tips & Variations
- For a swirl effect, apply gel food coloring inside the piping bag before adding meringue for a pretty marbled look.
- You can substitute maple syrup or honey for sugar in the jam for different sweetness profiles.
- Make the pavlovas and jam up to 5 days in advance, but whip the cream and assemble just before serving to keep textures crisp.
Storage
Store unfilled pavlovas in an airtight container at room temperature for up to 5 days. Keep blackberry jam refrigerated for up to a week. Whipped cream is best made fresh on the day of serving. Reheat pavlovas is not recommended as it can soften their crispy texture.
How to Serve
Serve this delicious recipe with your favorite sides.
FAQs
Can I make pavlovas ahead of time?
Yes, you can prepare the pavlovas and jam up to 5 days ahead. Just store pavlovas in an airtight container at room temperature and keep the jam refrigerated.
How do I prevent pavlovas from cracking?
Leave the pavlovas in the oven with the door closed after baking while it cools gradually. Removing them too soon or opening the oven door frequently can cause cracking or deflation.
PrintBlackberry Pavlovas Recipe
Blackberry Pavlovas are delicate meringue nests baked to perfection with a crisp exterior and soft inside, topped with a homemade blackberry jam and fresh whipped cream. This dessert combines sweet, tart, and creamy flavors with a stunning presentation, perfect for special occasions or a delightful treat.
- Prep Time: 20 minutes
- Cook Time: 1 hour 30 minutes
- Total Time: 1 hour 50 minutes
- Yield: 6 pavlovas 1x
- Category: Dessert
- Method: Baking
- Cuisine: Western
- Diet: Vegetarian
Ingredients
Pavlovas
- 5 egg whites
- 1 1/4 cup granulated sugar (250 grams)
- A few drops purple food coloring
- 2 tbsp cornstarch
- 2 tsp lemon juice
Blackberry Jam
- 2 cups blackberries (280 grams)
- 1/4 cup sugar (50 grams) or sweetener like maple syrup or honey
- 2 tbsp lemon juice
- 1 tbsp cornstarch
- 2 tbsp water
Whipped Cream
- 1 1/2 cups cold heavy cream (354 ml)
- 1/4 cup powdered sugar (31 grams)
- 1 tsp vanilla extract
Instructions
- Preheat Oven: Preheat your oven to 250°F (121°C) and line two baking sheets with parchment paper. This preparation ensures the pavlovas cook evenly without sticking.
- Whip Egg Whites: Using an electric mixer, whip the egg whites on medium speed for 1 minute. Gradually add the granulated sugar, then increase the speed to high and continue whipping for 9 minutes until stiff, glossy peaks form. At around minute 8, add the purple food coloring to get a uniform color.
- Add Stabilizers: Gently fold in cornstarch and lemon juice with a spatula to maintain the structure and add tartness, ensuring the meringue remains stable while baking.
- Swirl Coloring (Optional): For a swirl effect, brush gel food coloring inside a piping bag before filling it with the meringue. This technique adds visual interest to the pavlovas.
- Pipe Pavlovas: Transfer the meringue to two 16” piping bags fitted with open star tips. Pipe 3 1/2-inch nests with a hollow center for the filling on the prepared baking sheets.
- Bake Pavlovas: Bake the pavlovas for 1 hour in the preheated oven. Afterward, turn the oven off, leave the pavlovas inside for 30 minutes to cool slowly, preventing cracking or deflation from sudden temperature changes.
- Prepare Blackberry Jam: In a small saucepan, combine blackberries, sugar, lemon juice, and 2 tbsp water. Bring to a boil over medium heat and cook for 5-10 minutes, adding water or lemon juice if the mixture gets dry. Dissolve cornstarch in water, add to the pan, and cook for another minute until thickened. Cool the jam completely in the refrigerator.
- Make Whipped Cream: Just before assembling, whip cold heavy cream, powdered sugar, and vanilla on medium-high speed until stiff peaks form, about 3 minutes. Transfer to a piping bag for easy decorating.
- Assemble Pavlovas: Spoon chilled blackberry jam into the center of each pavlova nest, top generously with whipped cream, and garnish with fresh blackberries for a vibrant finish.
- Serve: Best served the same day to maintain the pavlovas’ crisp texture. Store unfilled pavlovas in an airtight container at room temperature for up to 5 days.
Notes
- Leave pavlovas in the oven after baking to avoid cracks and deflation from sudden temperature changes.
- The swirl color technique involves brushing gel food coloring inside the piping bag before filling it with meringue for a pretty visual effect.
- Prepare the pavlovas and jam up to 5 days in advance; whipped cream should be made just before serving for best texture.
- Use a piping bag with an open star tip to shape the pavlovas for a classic look.
- Adjust sugar in the jam to taste or substitute with natural sweeteners like honey or maple syrup.
- Store unfilled pavlovas in an airtight container at room temperature to maintain crispness.
Keywords: blackberry pavlova, pavlova recipe, meringue dessert, berry pavlova, whipped cream dessert, baked meringue, homemade pavlova