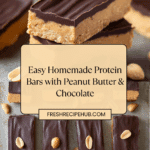
Protein Bars Recipe
If you’re on the lookout for a delicious, easy-to-make snack that fuels your day and satisfies your cravings, these Protein Bars are an absolute game changer. Packed with creamy peanut butter, a wholesome hit of protein powder, and just the right touch of natural sweetness, they deliver a perfect balance of taste and nutrition. Whether you’re powering through a workout, need a quick breakfast, or want a wholesome treat on the go, these bars are your new best friend. Plus, with optional chocolate to add a luscious finish, this recipe invites endless customization and a bit of fun in the kitchen.

Ingredients You’ll Need
These ingredients are wonderfully simple but each plays a vital role to give your Protein Bars the perfect texture, flavor, and nutritional boost. From creamy peanut butter that brings richness, to protein powder that packs muscle fuel, each component is essential.
- 1 1/2 cups peanut butter: Choose creamy or allergy-friendly alternatives for smoothness and a nutty base flavor.
- 3/4 cup protein powder (90g): This adds the bulk of the protein and defines the bar’s nutritional punch—pick your favorite flavor or try unsweetened for flexibility.
- 1/4 cup pure maple syrup or honey: Natural sweetness that ties all ingredients together without overpowering.
- 1/2 teaspoon salt: Just a pinch to enhance all the flavors and balance sweetness.
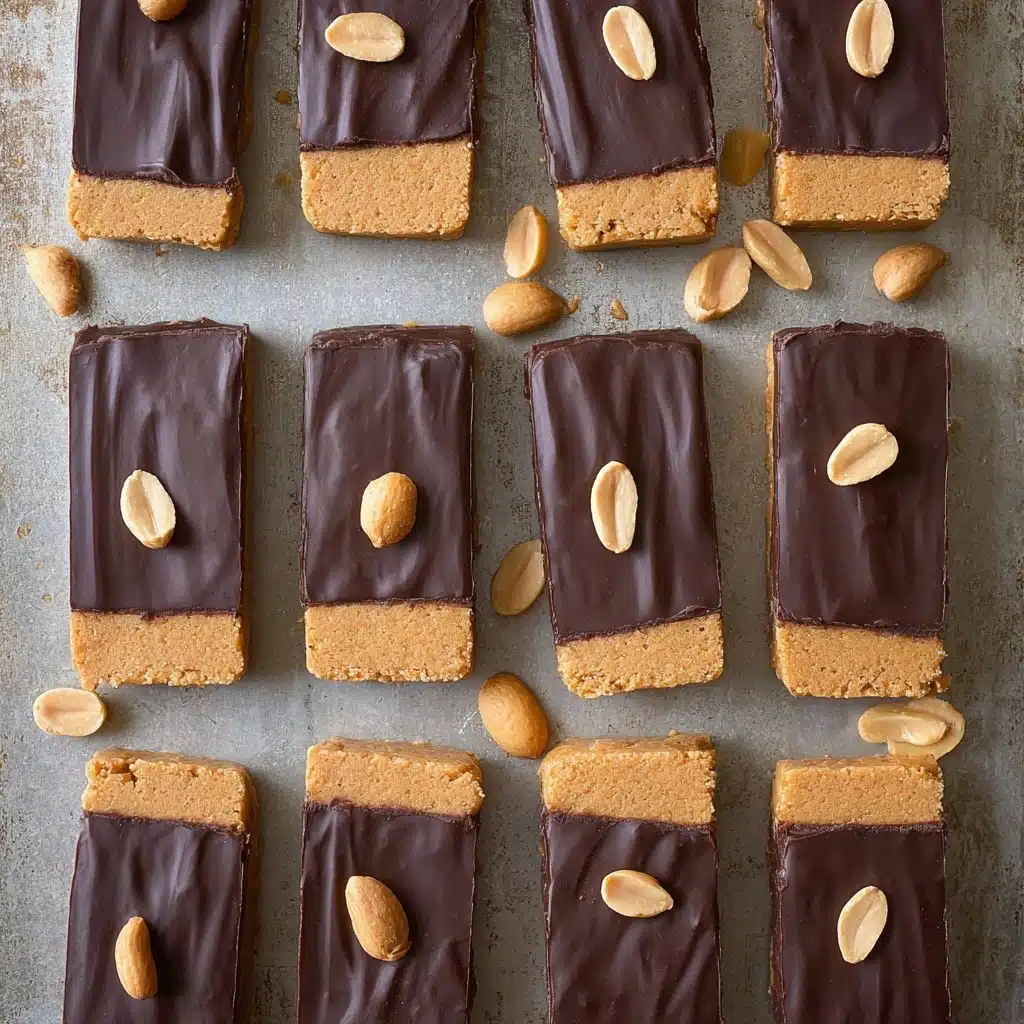
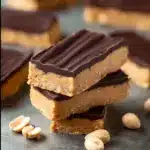
- 4 oz melted chocolate chips (optional): For a decadent chocolate coating or drizzle, turning your bars into an indulgent treat.
How to Make Protein Bars
Step 1: Choose Your Protein Powder
The taste of your Protein Bars starts right here, so select a protein powder you enjoy. Unsweetened options let you control the sweetness, while flavored versions can add a new twist. This step sets the foundation for your bars’ flavor profile.
Step 2: Mix the Base Ingredients
In a large bowl, combine the peanut butter, protein powder, maple syrup (or honey), and salt. Stir everything together thoroughly until you achieve a dough-like consistency. This step ensures every bar is a perfect blend of creamy, sweet, and salty.
Step 3: Shape Your Bars
You’ve got two choices: either use your hands to form individual bars or press the mixture evenly into a lined 8×8 pan for an easier slice-and-serve approach. Both methods work brilliantly, so pick what feels right for you.
Step 4: Add the Chocolate (Optional)
If chocolate is your jam, melt the chocolate chips and spread it over the pressed bars in the pan. Stirring in a teaspoon or two of oil can create a silkier chocolate sauce for smooth spreading. Alternatively, dip each bar into melted chocolate and let it set individually for extra flair.
Step 5: Chill and Set
Pop your bars (whether shaped or pan-pressed) into the fridge and let them chill until firm. This helps them hold their shape and makes cutting or handling easier without the sticky mess. Patience here really pays off!
How to Serve Protein Bars
Garnishes
Elevate your Protein Bars by sprinkling chopped nuts, shredded coconut, or a dusting of cocoa powder atop the chocolate layer before chilling. These simple touches add extra crunch, flavor bursts, and eye-catching appeal that make each bite more exciting.
Side Dishes
Enjoy your bars alongside fresh fruit like apple slices or a juicy berry mix for a refreshing burst of natural sweetness. Pairing with a creamy Greek yogurt or a glass of your favorite milk can also round out the snack and keeps you energized longer.
Creative Ways to Present
Thinking beyond the classic bar shape? Try rolling the dough into bite-sized balls for grab-and-go energy bites, or layer with nut butter and freeze in muffin tins for fun, portion-controlled servings. Wrap each bar in parchment paper tied with twine for lovely homemade gifts or lunchbox treats.
Make Ahead and Storage
Storing Leftovers
Once made, store your Protein Bars in an airtight container in the refrigerator. They stay fresh and chewy for up to a week, making them ideal to prepare in advance and enjoy throughout your busy week with minimal effort.
Freezing
To keep bars longer, freeze them individually wrapped. This locks in their flavor and texture for up to three months. When hunger strikes, just grab a bar and thaw it at room temperature or warm slightly in the microwave for a soft, satisfying treat.
Reheating
Reheating Protein Bars isn’t typically necessary, but if you prefer them warm, microwave for 10-15 seconds. If coated in chocolate, be gentle to prevent melting and maintain that perfect firm snap.
FAQs
Can I substitute peanut butter with another nut or seed butter?
Absolutely! Almond, cashew, sunflower seed, or even tahini work wonderfully. Just pick a butter you love and that suits your dietary needs to keep the bars creamy and flavorful.
What if I don’t have maple syrup or honey on hand?
Feel free to use agave nectar, brown rice syrup, or a liquid sweetener of choice. The key is to have a natural sweetener to bind the bars and provide gentle sweetness without being overpowering.
How do I know if I’m using the right protein powder?
Choose a protein powder with a flavor you enjoy. Unsweetened powders let you tailor sweetness, while flavored ones (vanilla, chocolate, etc.) can add depth and variety. Be mindful of powder texture—it should blend smoothly without a chalky feel.
Is it necessary to add salt?
Though a small amount, salt helps balance sweetness and enhances overall flavor. If you’re on a strict low-sodium diet, you can reduce or omit it, but a pinch really does make a difference.
Can these bars be made vegan or keto-friendly?
Yes! Using allergy-friendly nut butters, plant-based protein powders, and substituting maple syrup with low-carb sweeteners makes them both vegan and keto-friendly. You can also try specially formulated Keto Protein Bars with this recipe as a base.
Final Thoughts
Making your own Protein Bars is such a rewarding and fun experience—like crafting a personalized snack that fuels your body and satisfies your sweet tooth simultaneously. With just a handful of simple ingredients and minimal effort, you’ll have a batch of nourishing, tasty bars ready to keep you going strong. Give this recipe a try today and soon, you’ll wonder why you ever bought protein bars in the store!
PrintProtein Bars Recipe
These homemade protein bars are a delicious and nutritious snack that combines creamy peanut butter, protein powder, and natural sweeteners. They are easy to prepare, customizable with various flavors, and can be optionally coated with rich melted chocolate for an indulgent finish. Perfect for a quick energy boost post-workout or a healthy on-the-go treat.
- Prep Time: 10 minutes
- Cook Time: 0 minutes
- Total Time: 1 hour 10 minutes (including chilling time)
- Yield: 12 bars 1x
- Category: Snack
- Method: No-bake, mixing, chilling
- Cuisine: American
- Diet: Gluten Free
Ingredients
Main Ingredients
- 1 1/2 cup peanut butter (or allergy-friendly substitute)
- 3/4 cup protein powder (about 90g, unsweetened preferred)
- 1/4 cup pure maple syrup (or honey)
- 1/2 tsp salt
Optional Coating
- 4 oz melted chocolate chips
- 2 tsp oil (optional, to smooth the melted chocolate)
Instructions
- Prepare the mixture: In a mixing bowl, combine the peanut butter, protein powder, maple syrup, and salt. Stir thoroughly until a dough-like consistency forms. Make sure to mix well so all ingredients are evenly incorporated.
- Shape the bars: You can either use your hands to shape the mixture into individual bars or press the mixture evenly into a lined 8×8-inch pan to create a slab. If using the pan, smoothing the top will make for even-cut bars later.
- Apply the chocolate coating (optional): If you choose to add chocolate, melt the chocolate chips gently. For a smoother sauce, stir in 2 teaspoons of oil into the melted chocolate, although this is optional. Spread the melted chocolate evenly over the top of the bar mixture in the pan.
- Chill the bars: Place the shaped bars or the pan in the refrigerator and chill until firm, about 1 to 2 hours. This allows the bars to set properly for easier handling or cutting.
- Cut and store: Once chilled, if using the pan method, cut the slab into bars of your desired size. If not coated in chocolate, you can also dip individual bars into the melted chocolate and then chill again until the coating sets.
Notes
- Use unsweetened protein powder for the best flavor balance, but feel free to experiment with different protein powder flavors.
- If allergic to peanuts, substitute peanut butter with sunflower seed butter or another allergy-friendly nut or seed butter.
- Maple syrup can be replaced with honey or a keto-friendly sweetener depending on dietary needs.
- Adding oil to the melted chocolate helps create a smooth and shiny finish but is optional.
- Store bars in an airtight container in the refrigerator for up to one week or freeze for longer storage.
Nutrition
- Serving Size: 1 bar (about 45g)
- Calories: 220
- Sugar: 6g
- Sodium: 150mg
- Fat: 14g
- Saturated Fat: 3g
- Unsaturated Fat: 10g
- Trans Fat: 0g
- Carbohydrates: 12g
- Fiber: 3g
- Protein: 12g
- Cholesterol: 0mg
Keywords: protein bars, homemade protein bars, no-bake protein bars, healthy snack, peanut butter protein bars, workout snack