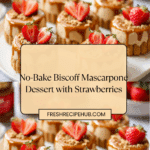
Biscoff Desserts (No Bake) Recipe
If you have a sweet tooth and a love for effortless indulgence, then Biscoff Desserts (No Bake) are about to become your new obsession. These luscious treats combine the creamy richness of mascarpone and whipped cream with the irresistible caramelized crunch of Biscoff cookies and spread, all coming together in layers that require zero oven time. Whether you’re craving an elegant dessert for guests or just want a quick fix to satisfy your cravings, this no-bake delight balances textures and flavors with such ease it feels like a magic trick – but really, it’s just pure deliciousness.
Ingredients You’ll Need
Ingredients You’ll Need
Gathering simple but essential ingredients is the secret behind making spectacular Biscoff Desserts (No Bake). Each component plays its part, whether adding creaminess, sweetness, structure, or that iconic Biscoff flavor that you’ll fall in love with.
- Mascarpone (200 g): The star of creamy texture, it provides that silky richness every no-bake dessert needs.
- Whipping cream stabilizer (16 g): Keeps the whipped cream firm and luscious for a perfect finish.
- Vanilla sugar (8 g): Adds gentle vanilla sweetness that elevates the flavor profile.
- Granulated sugar (40 g): Enhances sweetness and balances the Biscoff’s caramel notes.
- Heavy cream (300 ml): Whipped to soft peaks, it lightens the mascarpone for dreamy consistency.
- Biscoff cookies: Crumbled for crunch and layered for texture contrast.
- Biscoff spread: The rich caramelized core ingredient that brings all the flavors together.
- Ladyfingers: The delicate base layers that soak up the cream and add structure.
- Strawberries: Fresh and tart, perfect for garnishing and cutting through the sweetness.
How to Make Biscoff Desserts (No Bake)
Step 1: Prepare the Cream Mixture
Start by combining mascarpone, whipping cream stabilizer, vanilla sugar, and granulated sugar in a deep bowl. Whisk this mixture for about a minute to soften and blend all the flavors seamlessly. Gradually add the heavy cream, whipping it all together until you achieve stiff peaks. This luscious cream will be the perfect binding and fluffy layer for the dessert.
Step 2: Prepare the Ladyfinger Base
Cut ladyfingers into thirds, then slice one of those pieces again into three smaller parts; this will give you the perfect size for the base layer inside your baking ring. These small pieces form a sturdy yet tender foundation that absorbs the cream and Biscoff spread so they meld harmoniously.
Step 3: Assemble the Outer Ladyfinger Ring
Line a baking ring with plastic wrap to prevent sticking and place it on a sturdy plate or coaster. Stand the ladyfingers upright against the ring’s sides, creating a charming border around the dessert. Fill the bottom with the smaller pieces you prepared earlier to complete the base.
Step 4: Layer Your Biscoff Dessert
Pipe a generous layer of the prepared cream over the ladyfinger base. Next, spread a layer of Biscoff spread over the cream, then sprinkle crumbled Biscoff cookies to add satisfying crunch. Finish this layer with another round of cream, making sure not to overfill as the final layer of Biscoff spread will go on top.
Step 5: Chill and Set
Now, the hardest part: patience. Place your assembled dessert in the refrigerator and let it chill for at least 4 to 5 hours, though overnight is best. This resting period allows the flavors to meld, the ladyfingers to soften just right, and the cream to set into a sliceable masterpiece.
Step 6: Warm the Biscoff Spread
Heat your Biscoff spread gently either on the stovetop over low heat or briefly in a microwave safe container. The goal is to liquefy it slightly so it can be piped easily as a final glaze on top of the dessert.
Step 7: Final Decoration
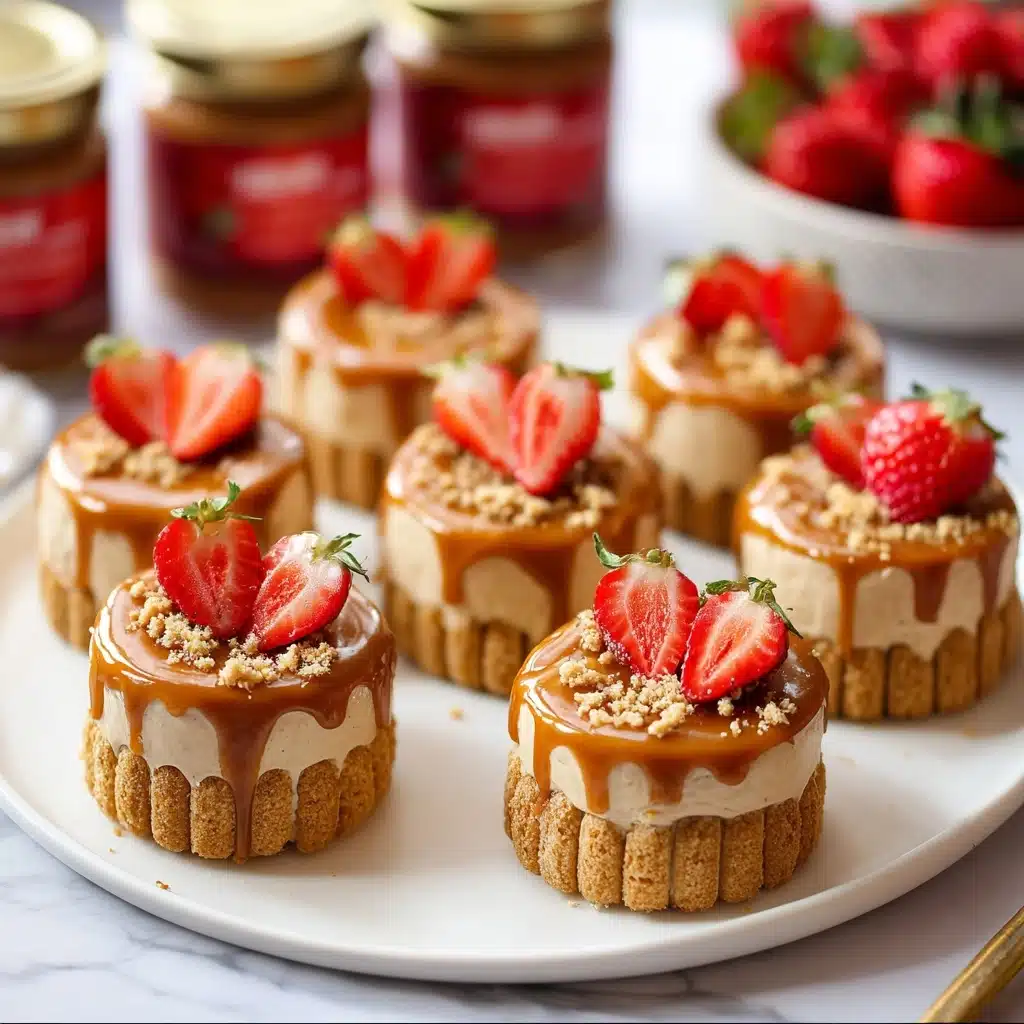
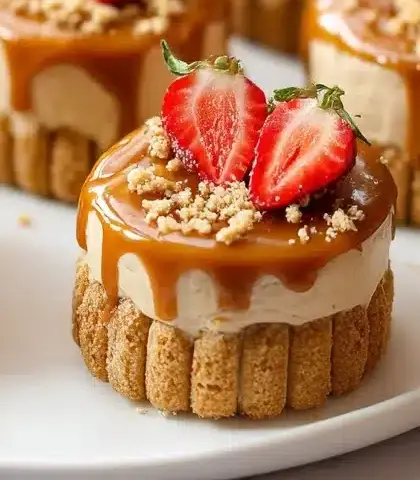
Pipe a thin, glossy layer of the warmed Biscoff spread over the chilled dessert for that irresistible caramel sheen. Add your favorite garnishes like delicate Biscoff lines, halved fresh strawberries, and a sprinkle of cookie crumbs to elevate presentation and texture.
Step 8: Serve and Enjoy
Once decorated, your no-bake Biscoff masterpiece is ready to slice and enjoy. Each bite delivers a creamy, crispy, and sweet flavor journey that’s impossible to resist.
How to Serve Biscoff Desserts (No Bake)
Garnishes
Adding the right garnishes transforms your Biscoff Desserts (No Bake) from simple to spectacular. Fresh strawberries bring vibrant color and a touch of tartness that pairs beautifully with the caramel richness. Crumbled Biscoff cookies sprinkled just before serving add texture and visual appeal, while delicate lines of melted Biscoff spread on top make the dessert look as enticing as it tastes.
Side Dishes
Pair this dessert with a light, refreshing side like a mixed berry salad or a scoop of plain vanilla ice cream. These options complement the sweet, spiced Biscoff flavors without overpowering them, allowing the dessert’s star qualities to shine through.
Creative Ways to Present
Try serving your Biscoff Desserts (No Bake) in individual glass jars for an elegant touch, perfect for dinner parties. Layer the ingredients visibly to showcase the luscious textures. Alternatively, create mini tartlets or parfait-style treats using small dessert cups to wow your guests with personalized portions.
Make Ahead and Storage
Storing Leftovers
Store your leftover Biscoff Desserts (No Bake) covered tightly in the refrigerator for up to 3 days. Keeping them chilled helps maintain the creamy texture and prevents the ladyfingers from becoming too soggy, so every bite stays delightful.
Freezing
While freezing can affect texture slightly, you can freeze this dessert wrapped securely in plastic wrap and aluminum foil for up to one month. Thaw overnight in the refrigerator before serving for best results, although the cream might be a little softer.
Reheating
Since this is a no-bake dessert best enjoyed chilled, reheating is not recommended as it will disrupt the creamy texture and delicate layers. Instead, simply allow it to come to refrigerator temperature if it’s been frozen for a smooth experience.
FAQs
Can I substitute mascarpone in this recipe?
While mascarpone is ideal for its creamy richness, you can use cream cheese mixed with a little heavy cream as an alternative, but it may slightly change the flavor and texture of the dessert.
How long does it take for the dessert to set properly?
For best results, let the dessert chill for at least 4 to 5 hours, but overnight gives the flavors time to fully meld and the texture to firm up nicely.
Can I make these desserts gluten-free?
Yes! Just swap the ladyfingers and Biscoff cookies for gluten-free versions. Be sure your substitutes have a similar texture for best effect.
Is this dessert suitable for kids?
Absolutely! It’s sweet, creamy, and fun with familiar flavors. Just check the ingredients to ensure they fit any dietary restrictions for your little ones.
Can I prepare individual servings instead of one large dessert?
Definitely. Using small jars or dessert cups allows you to create charming individual portions that set faster and look stunning on any table.
Final Thoughts
There’s something undeniably joyful about creating a dessert that feels luxurious yet comes together with no baking fuss at all. Biscoff Desserts (No Bake) combine comfort, flavor, and elegance in one satisfying treat that’s perfect for any occasion. I can’t wait for you to try this recipe and see just how easy it is to impress your taste buds and loved ones alike – your new favorite dessert awaits!
PrintBiscoff Desserts (No Bake) Recipe

A delicious no-bake Biscoff dessert featuring layers of mascarpone cream, ladyfingers, Biscoff spread, and cookie crumbs. This dessert is easy to assemble, chilled to set, and garnished with strawberries and Biscoff elements for a rich, creamy, and crunchy treat.
- Prep Time: 20 minutes
- Cook Time: 0 minutes (no bake)
- Total Time: 4 hours 20 minutes to overnight (including chilling time)
- Yield: 6 servings 1x
- Category: Dessert
- Method: No Bake
- Cuisine: European
- Diet: Vegetarian
Ingredients
Cream Mixture
- 200 g mascarpone
- 16 g whipping cream stabilizer
- 8 g vanilla sugar
- 40 g granulated sugar
- 300 ml heavy cream
Base and Layers
- Ladyfingers (quantity as needed; approximately 15-20 pieces)
- Biscoff spread (approx. 150-200 g for layering and topping)
- Biscoff cookies (crumbed for layering and garnish; about 50 g)
Garnish
- Strawberries (6-8, halved)
Instructions
- Prepare the Cream Mixture: In a deep bowl, combine mascarpone, whipping cream stabilizer, vanilla sugar, and granulated sugar. Mix for 1 minute until smooth and slightly thickened. Gradually add the heavy cream while continuing to mix until stiff peaks form, creating a rich and stable cream.
- Prepare the Ladyfinger Base: Cut the ladyfingers into thirds, then take one of those pieces and cut it again into three smaller pieces to form the base layer of the dessert. Repeat until you have enough small pieces to cover the base.
- Assemble the Base Layer: Line a baking ring with plastic wrap and place it on a plate or coaster. Arrange the whole ladyfinger pieces along the sides of the ring to create a wall. Fill the bottom with the smaller ladyfinger pieces, forming a sturdy base for the dessert.
- Add Cream and Biscoff Layers: Pipe a generous layer of the prepared cream onto the ladyfinger base. Spread a layer of Biscoff spread over the cream, sprinkle Biscoff cookie crumbs evenly on top, and then add another layer of cream. Be careful not to overfill, as a finishing layer of Biscoff spread will be added.
- Chill to Set: Place the assembled dessert in the refrigerator and allow it to set for at least 4-5 hours, preferably overnight, so the flavors meld and the cream firms up properly.
- Prepare the Biscoff Topping: Warm the Biscoff spread in a saucepan over low heat or melt it briefly in the microwave until smooth and liquid.
- Apply Final Biscoff Layer: Pipe a thin, even layer of the warmed Biscoff spread over the top of the chilled dessert, smoothing it out for a glossy finish.
- Garnish the Dessert: Decorate the top with artistic Biscoff lines using a piping bag, place halved strawberries for freshness and color, and sprinkle additional Biscoff cookie crumbs for texture and visual appeal.
Notes
- Use a heavy cream stabilizer to ensure the cream mixture holds its shape well during chilling.
- If plastic wrap is not available, parchment paper can be used to line the baking ring.
- Ensure the Biscoff spread is warmed gently to avoid burning or changing texture.
- For a firmer base, ladyfingers can be lightly dipped in coffee or milk before assembling; however, this is optional.
- Refrigerate the dessert overnight for best flavor and texture development.
Nutrition
- Serving Size: 1 piece (approx. 150 g)
- Calories: 350 kcal
- Sugar: 25 g
- Sodium: 90 mg
- Fat: 22 g
- Saturated Fat: 14 g
- Unsaturated Fat: 7 g
- Trans Fat: 0.2 g
- Carbohydrates: 30 g
- Fiber: 1.5 g
- Protein: 5 g
- Cholesterol: 75 mg
Keywords: Biscoff, no bake dessert, mascarpone cream, ladyfinger dessert, easy layered dessert, Biscoff spread recipe, chilled dessert