Heart-Shaped Red Velvet Whoopie Pie Recipe
Introduction
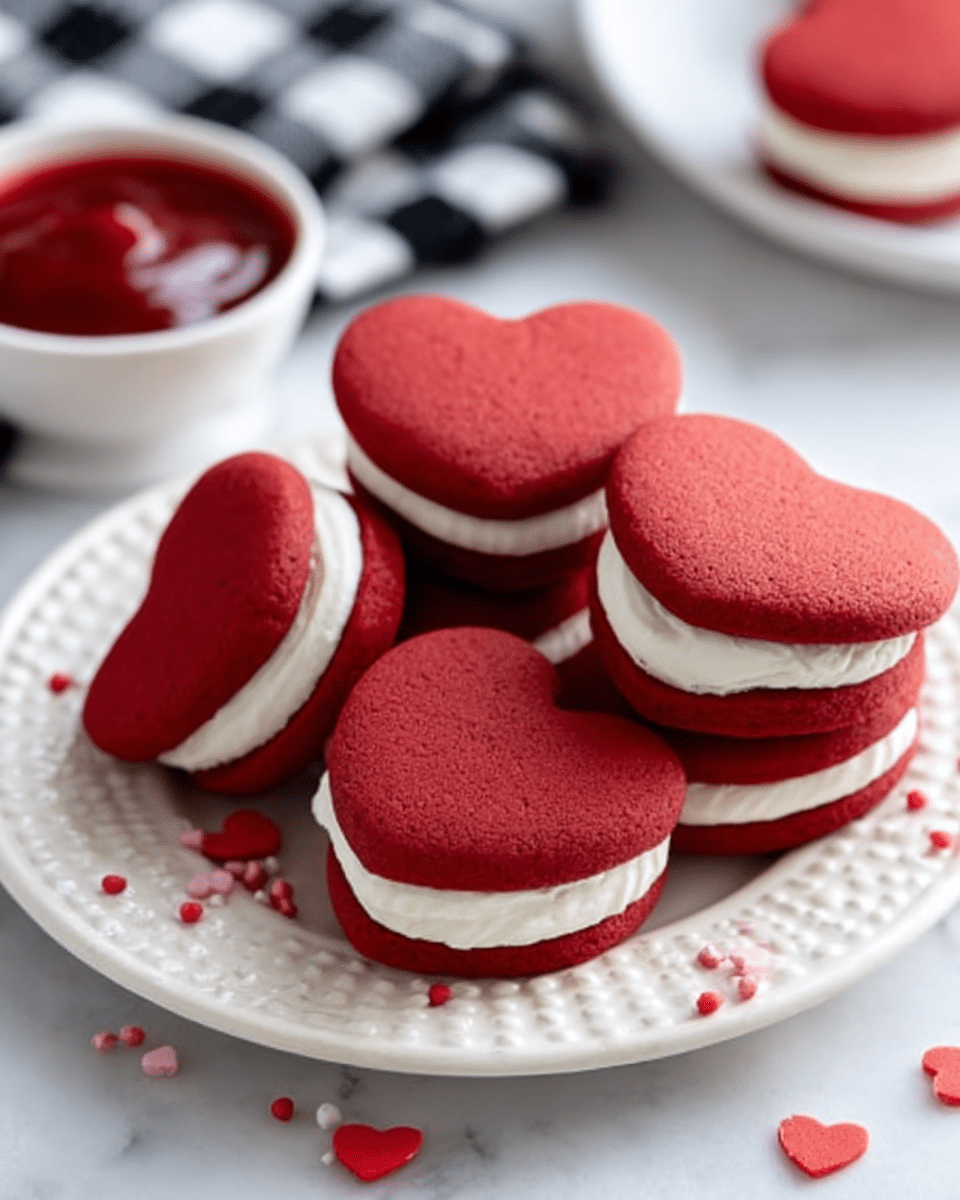
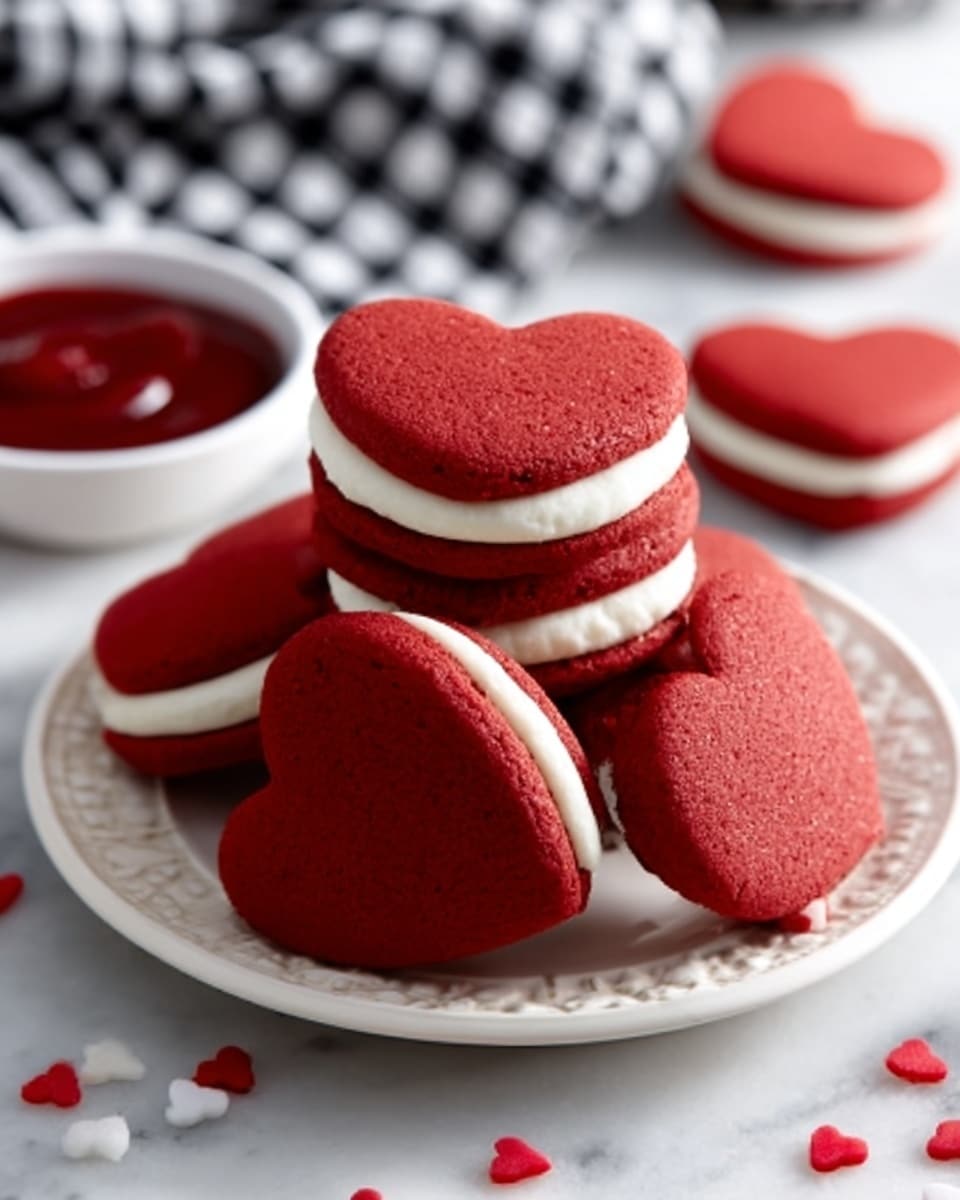
These heart-shaped red velvet whoopie pies are a delightful twist on a classic treat, perfect for special occasions or anytime you want to impress. Soft, red velvet cakes sandwich a creamy, tangy cream cheese filling, creating a delicious balance of flavors and textures.
Ingredients
- 2½ cups all-purpose flour
- ¼ cup unsweetened cocoa powder
- 1 teaspoon baking soda
- ½ teaspoon salt
- ½ cup salted butter, softened (for batter)
- ⅔ cup granulated sugar
- ⅔ cup light brown sugar, packed
- 2 large eggs, room temperature
- 1¼ cups buttermilk, room temperature
- 1 teaspoon white vinegar
- 2 teaspoons vanilla extract
- 2 tablespoons red gel food coloring (or more for deeper red)
- 8 ounces cream cheese, softened
- ½ cup salted butter, softened (for filling)
- 2½ cups powdered sugar
Instructions
- Step 1: Preheat the oven to 350°F (175°C) and line two baking sheets with parchment paper.
- Step 2: Create a heart-shaped stencil by tracing a small heart-shaped cookie cutter evenly across the parchment paper, leaving about an inch between each. Flip the parchment paper to avoid pencil marks on the batter.
- Step 3: In a medium bowl, whisk together the flour, cocoa powder, baking soda, and salt until combined.
- Step 4: In a large bowl, cream the softened butter, granulated sugar, and brown sugar using a mixer on medium-high speed for about 3 minutes until fluffy.
- Step 5: Beat in the eggs until smooth. Add the buttermilk and red food coloring, mixing just until incorporated.
- Step 6: Gradually add the dry ingredients to the wet mixture on low speed, mixing just until combined to avoid overmixing.
- Step 7: Gently stir in the white vinegar and vanilla extract, ensuring the batter remains thick but pipeable.
- Step 8: Transfer the batter to a piping bag fitted with a Wilton 1A round tip or a ziplock bag with a corner cut off.
- Step 9: Pipe the batter onto the stenciled hearts, maintaining about an inch of space between each. Outline each heart and fill in, smoothing with an offset spatula if desired.
- Step 10: Bake for 8-10 minutes, or until the cakes lose their shine and spring back slightly when touched. Let them cool on the pans for a few minutes before transferring to wire racks to cool completely.
- Step 11: To make the filling, beat the softened cream cheese and butter until light and fluffy, about 2 minutes.
- Step 12: Gradually add the powdered sugar, one cup at a time, beating for 1-2 minutes after each addition until the frosting is silky smooth. Transfer to a piping bag with a Wilton 1A tip.
- Step 13: Match the cakes by shape and size. Pipe about 2 tablespoons of filling onto one half, then sandwich with the matching cake. Repeat for all whoopie pies.
Tips & Variations
- For a deeper red color, add more red gel food coloring a little at a time until you reach your desired hue.
- Use full-fat cream cheese and butter for a richer, smoother filling.
- Try adding a pinch of cinnamon or espresso powder to the batter to enhance the chocolate flavor.
- Substitute buttermilk with regular milk plus 1 tablespoon vinegar if you don’t have buttermilk on hand.
Storage
Store the assembled whoopie pies in an airtight container in the refrigerator for up to 4 days. Let them come to room temperature before serving for the best texture. They can also be frozen separately (cakes and filling) for up to 1 month; thaw completely before assembling.
How to Serve
Serve this delicious recipe with your favorite sides.
FAQs
Can I make the batter ahead of time?
It’s best to prepare the batter fresh and bake immediately for the best texture and rise. However, you can refrigerate the batter for a few hours if needed, but bring it back to room temperature before piping.
What if I don’t have a heart-shaped cookie cutter?
You can freehand the heart shapes with a piping bag or use any other shape stencil you prefer. Alternatively, pipe small circles for traditional whoopie pies.
PrintHeart-Shaped Red Velvet Whoopie Pie Recipe

These Heart-Shaped Red Velvet Whoopie Pies are a delightful twist on a classic treat, perfect for special occasions like Valentine’s Day or anytime you want to share some love through baking. Soft, red velvet cake rounds shaped like hearts sandwich a creamy, smooth cream cheese filling, creating a visually stunning and delicious dessert that’s as fun to make as it is to eat.
- Prep Time: 20 minutes
- Cook Time: 10 minutes
- Total Time: 30 minutes
- Yield: Approximately 24 whoopie pies 1x
- Category: Dessert
- Method: Baking
- Cuisine: American
- Diet: Vegetarian
Ingredients
Dry Ingredients
- 2½ cups all-purpose flour
- ¼ cup unsweetened cocoa powder
- 1 teaspoon baking soda
- ½ teaspoon salt
Batter Ingredients
- ½ cup salted butter, softened
- ⅔ cup granulated sugar
- ⅔ cup light brown sugar, packed
- 2 large eggs, room temperature
- 1¼ cups buttermilk, room temperature
- 1 teaspoon white vinegar
- 2 teaspoons vanilla extract
- 2 tablespoons red gel food coloring (or more for deeper red)
Filling Ingredients
- 8 ounces cream cheese, softened
- ½ cup salted butter, softened
- 2½ cups powdered sugar
Instructions
- Preheat and prepare baking sheets. Preheat your oven to 350°F (175°C) and line two baking sheets with parchment paper to ensure easy removal of the cakes after baking.
- Create heart shape stencil. Using a small heart-shaped cookie cutter or stencil, trace heart shapes evenly across the parchment paper, leaving about an inch between each. Flip the parchment over so the pencil marks are on the underside to avoid mixing them into the batter.
- Mix dry ingredients. In a medium bowl, whisk together the all-purpose flour, unsweetened cocoa powder, baking soda, and salt until well combined. Set aside.
- Cream butter and sugars. In a large bowl, use a stand or hand mixer to beat the softened butter, granulated sugar, and light brown sugar on medium-high speed for about 3 minutes until the mixture is fluffy and pale.
- Add eggs and wet ingredients. Beat in the room temperature eggs one at a time until fully incorporated. Then add the buttermilk and red gel food coloring and mix just until blended to avoid overmixing.
- Combine dry and wet ingredients. Gradually add the dry ingredient mixture to the wet ingredients on low speed. Mix gently and just until combined to maintain a thick but pipeable batter consistency.
- Add vinegar and vanilla. Gently stir in the white vinegar and vanilla extract to the batter, which helps enhance the red velvet flavor and texture.
- Prepare piping bag. Transfer the batter into a piping bag fitted with a Wilton 1A round tip or a ziplock bag with a corner cut off for easy piping.
- Pipe heart shapes. Pipe the batter onto the pre-stenciled heart shapes on the parchment paper, leaving about an inch of space between each. Outline each heart first, then fill in and smooth with an offset spatula if you like.
- Bake the cakes. Bake the heart-shaped cakes for 8-10 minutes or until they lose their shine and spring back slightly when gently pressed. Allow the cakes to cool on the pans for a few minutes before transferring to wire racks to cool completely.
- Make the filling. In a mixing bowl, beat the softened cream cheese and butter together on medium speed for about 2 minutes until light and fluffy.
- Add powdered sugar. Gradually beat in the powdered sugar, about 1 cup at a time, mixing for 1-2 minutes after each addition until the frosting is silky smooth and spreadable. Transfer to a piping bag fitted with a Wilton 1A tip.
- Assemble whoopie pies. Match the cooled cake hearts by size and shape. Pipe about 2 tablespoons of cream cheese filling onto the flat side of one heart and gently sandwich with the matching heart cake. Repeat until all pies are assembled.
Notes
- Use gel food coloring to avoid thinning the batter with liquid color.
- Make sure all dairy ingredients are at room temperature for best mixing results.
- Do not overmix the batter as it can affect cake texture.
- Cooling the cakes completely before assembling prevents the filling from melting.
- These whoopie pies can be stored in an airtight container in the refrigerator for up to 5 days.
- For a deeper red color, add more red gel food coloring as desired.
Keywords: red velvet, whoopie pies, heart-shaped desserts, cream cheese filling, Valentine’s Day dessert, homemade treats