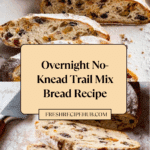
No Knead Trail Mix Bread Recipe
Introduction
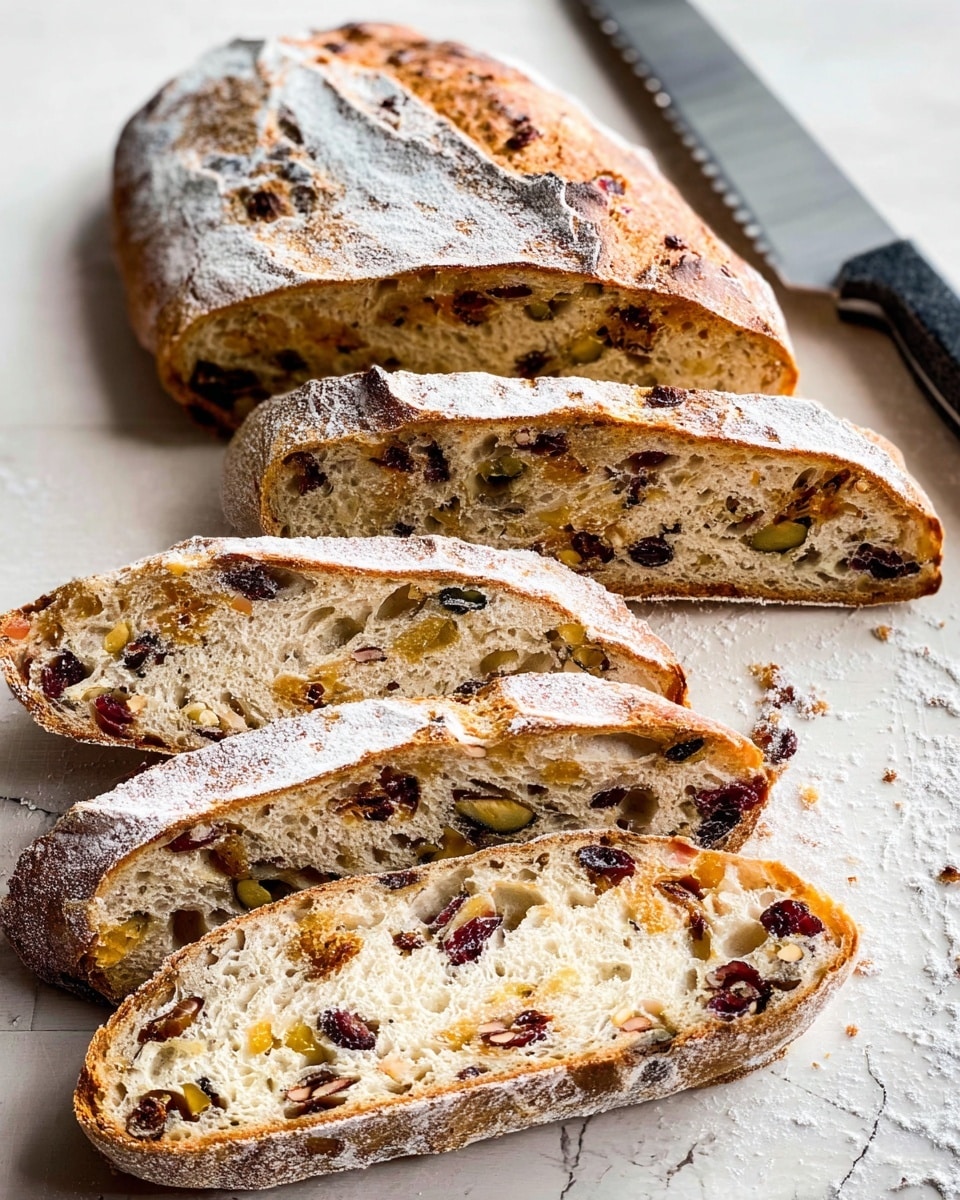
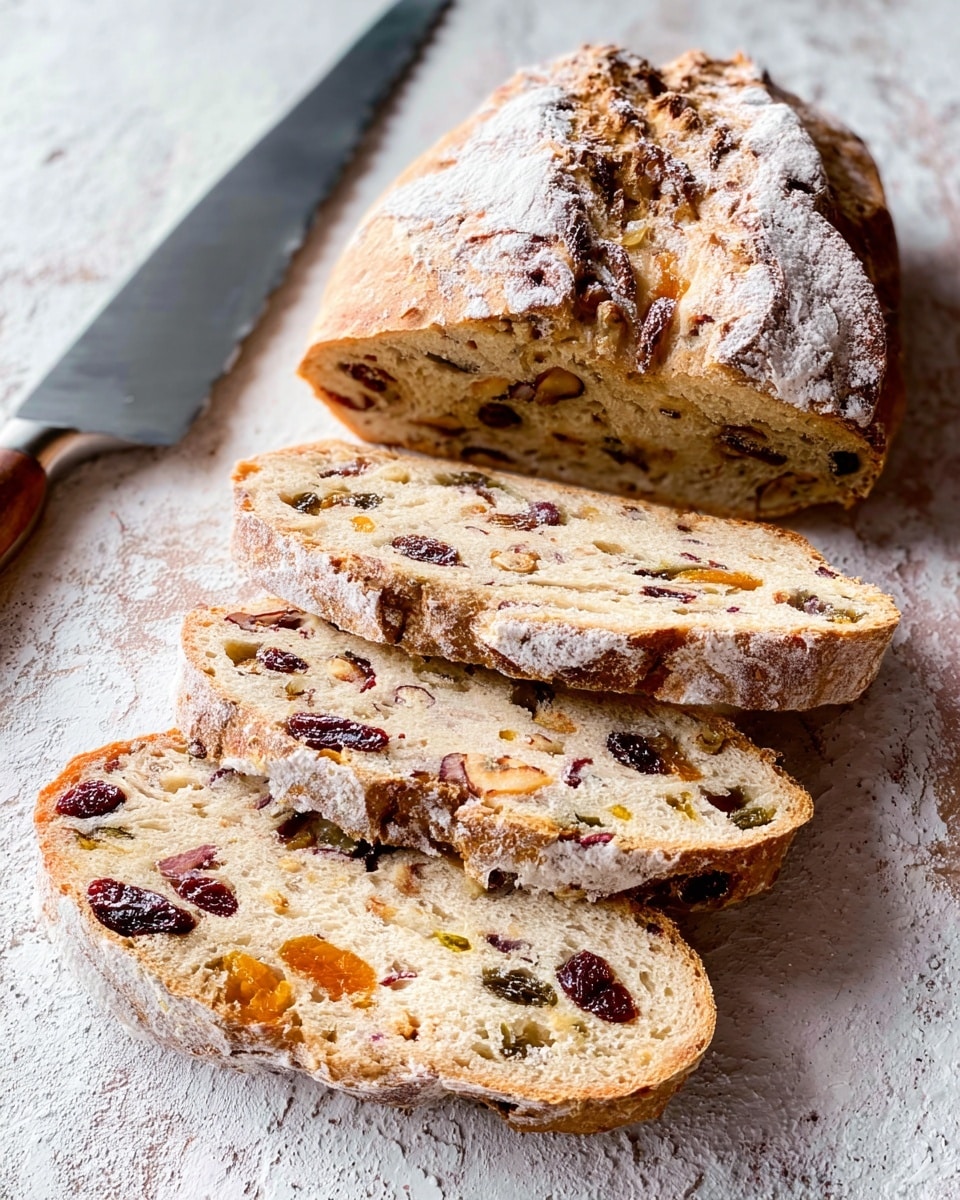
This No Knead Trail Mix Bread combines the rustic charm of homemade bread with the sweet and nutty flavors of a trail mix. It’s an easy, hands-off recipe that yields a chewy, flavorful loaf perfect for breakfast or snacking.
Ingredients
- 390 grams bread flour (approximately 3 1/4 cups)
- 113 grams all purpose flour (a scant cup)
- 2 tsp salt
- 1 packet instant yeast (2 1/4 teaspoons)
- 1 3/4 cups cool water
- 1/2 cup chopped walnuts
- 1/2 cup chopped pecans
- 1/2 cup golden raisins
- 1/2 cup dried cranberries
Instructions
- Step 1: In a very large bowl, whisk together the bread flour, all-purpose flour, salt, and instant yeast until evenly combined.
- Step 2: Stir in the cool water until a sticky, shaggy dough forms.
- Step 3: Using clean hands, fold in the walnuts, pecans, golden raisins, and dried cranberries, ensuring they are evenly distributed throughout the dough.
- Step 4: Cover the bowl tightly with plastic cling wrap and leave the dough on the counter overnight, or up to 18 hours. Avoid placing it in a warm spot to prevent drying out.
- Step 5: The next day, the dough should be puffed and bubbly. Turn it out onto a lightly floured surface and gently shape it into a rounded loaf.
- Step 6: Place the loaf on a large piece of parchment paper (about 12×16 inches) and transfer it into a Dutch oven, cover with the lid.
- Step 7: Let the dough rise in a warm spot for 2 hours. It will puff slightly but won’t rise dramatically.
- Step 8: After rising, make three shallow slashes across the top of the loaf with a sharp knife or lame to allow expansion during baking. Cover and place the Dutch oven in a cold oven.
- Step 9: Set the oven to 450°F and bake for 50 minutes with the lid on. Then remove the lid and bake an additional 10 minutes until the bread’s internal temperature reaches about 205°F.
- Step 10: Carefully remove the bread from the Dutch oven and let it cool on a rack. Enjoy warm or at room temperature.
Tips & Variations
- Substitute dried cherries or apricots for cranberries and raisins to vary the sweet flavor.
- Use an instant-read thermometer to check doneness for the best results.
- If you don’t have a Dutch oven, use a heavy oven-safe pot with a lid for baking.
Storage
Store the bread wrapped loosely in parchment or in a paper bag at room temperature for up to 3 days. For longer storage, slice and freeze the bread, then toast slices straight from the freezer. Reheat gently in the oven to revive crustiness.
How to Serve
Serve this delicious recipe with your favorite sides.
FAQs
Can I use warm water instead of cool water?
Using cool water helps slow fermentation for better flavor development. Warm water can speed up the rise but may lead to less complex taste and affect texture.
Do I need to knead the dough at all?
No kneading is required for this recipe. The long fermentation and folding in the ingredients by hand are enough to develop the gluten and texture.
PrintNo Knead Trail Mix Bread Recipe
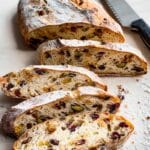
This No Knead Trail Mix Bread is a delicious and easy-to-make artisan-style loaf packed with chopped walnuts, pecans, golden raisins, and dried cranberries. Utilizing a slow overnight fermentation and a hot Dutch oven baking method, this bread develops a crispy crust and a chewy, flavorful crumb without any kneading required. Perfect for breakfast, snacks, or sandwiches, it’s a delightful combination of nutty and sweet flavors that bring a unique twist to classic homemade bread.
- Prep Time: 15 minutes
- Cook Time: 1 hour
- Total Time: 13 hours 15 minutes (including fermentation and rising time)
- Yield: 1 loaf (about 10-inch diameter Dutch oven size) 1x
- Category: Bread
- Method: Baking
- Cuisine: American
- Diet: Vegetarian
Ingredients
Dry Ingredients
- 390 grams bread flour (approximately 3 1/4 cups)
- 113 grams all purpose flour (scant 1 cup)
- 2 tsp salt
- 1 packet instant yeast (2 1/4 teaspoons)
Water
- 1 3/4 cups cool water
Trail Mix
- 1/2 cup chopped walnuts
- 1/2 cup chopped pecans
- 1/2 cup golden raisins
- 1/2 cup dried cranberries
Instructions
- Combine Dry Ingredients: In a very large bowl, whisk together the bread flour, all-purpose flour, salt, and instant yeast thoroughly so everything is evenly mixed.
- Add Water and Form Dough: Stir in the cool water to the dry ingredients until a sticky, shaggy dough forms. The mixture will be quite wet and rough looking, which is perfect for this style of bread.
- Incorporate Trail Mix: Using clean hands, fold the chopped walnuts, pecans, golden raisins, and dried cranberries into the dough. Be sure to mix everything evenly so the nuts and fruit are well distributed throughout.
- First Rise – Overnight Fermentation: Cover the bowl tightly with plastic cling wrap or airtight wrap to prevent drying. Leave the dough to ferment at room temperature on the countertop for 12 to 18 hours. The dough will puff up and develop bubbles during this time.
- Shape the Dough: Once the dough has risen and is bubbly, gently turn it out onto a lightly floured surface. Shape it into a smooth, rounded loaf without knocking out too much air.
- Prepare for Second Rise: Place the shaped loaf in the center of a large piece of parchment paper (approximately 12×16 inches). This will make it easier to transfer the dough later.
- Second Rise in Dutch Oven: Place the parchment paper and loaf into a Dutch oven (around 10 inches in diameter). Cover with the lid and let it rise in a warm spot for 2 hours. The dough will puff slightly but will not double in size significantly.
- Score the Loaf: After the second rise, use a lame or a very sharp knife to make three shallow slashes across the top of the bread. This allows for expansion during baking and gives the bread an artisan look.
- Bake the Bread: Place the covered Dutch oven with the dough into a COLD oven and set the temperature to 450°F (232°C). Bake for 50 minutes with the lid on. Then remove the lid and bake for an additional 10 minutes or until the internal temperature reaches about 205°F (96°C), indicating it’s fully baked.
- Cool and Serve: Remove the bread from the Dutch oven and transfer to a wire rack to cool. You can enjoy it warm or wait until it cools completely for easier slicing.
Notes
- Read through the entire recipe before starting to understand the steps and timing.
- Use plastic cling wrap or an airtight cover to prevent the dough from drying out during the long first rise.
- The dough’s texture will be sticky and shaggy—do not add extra flour to dry it out.
- Having an instant read thermometer is helpful to ensure the bread is perfectly baked.
- Do not place the dough in a warm spot during the overnight rise; keep it at room temperature on the counter to develop flavor.
- The Dutch oven traps steam, which helps create a crispy crust.
Keywords: no knead bread, trail mix bread, artisan bread, easy homemade bread, dried fruit bread, nut bread, Dutch oven bread